
Example of Mid-Chip solder balls (beads)
The IPC-A-610H states that solder balls are acceptable for all product classes provided they are entrapped or encapsulated e.g. in no-clean flux residue, under conformal coating, soldered to a metal surface, enclosed under the solder mask or under a component.

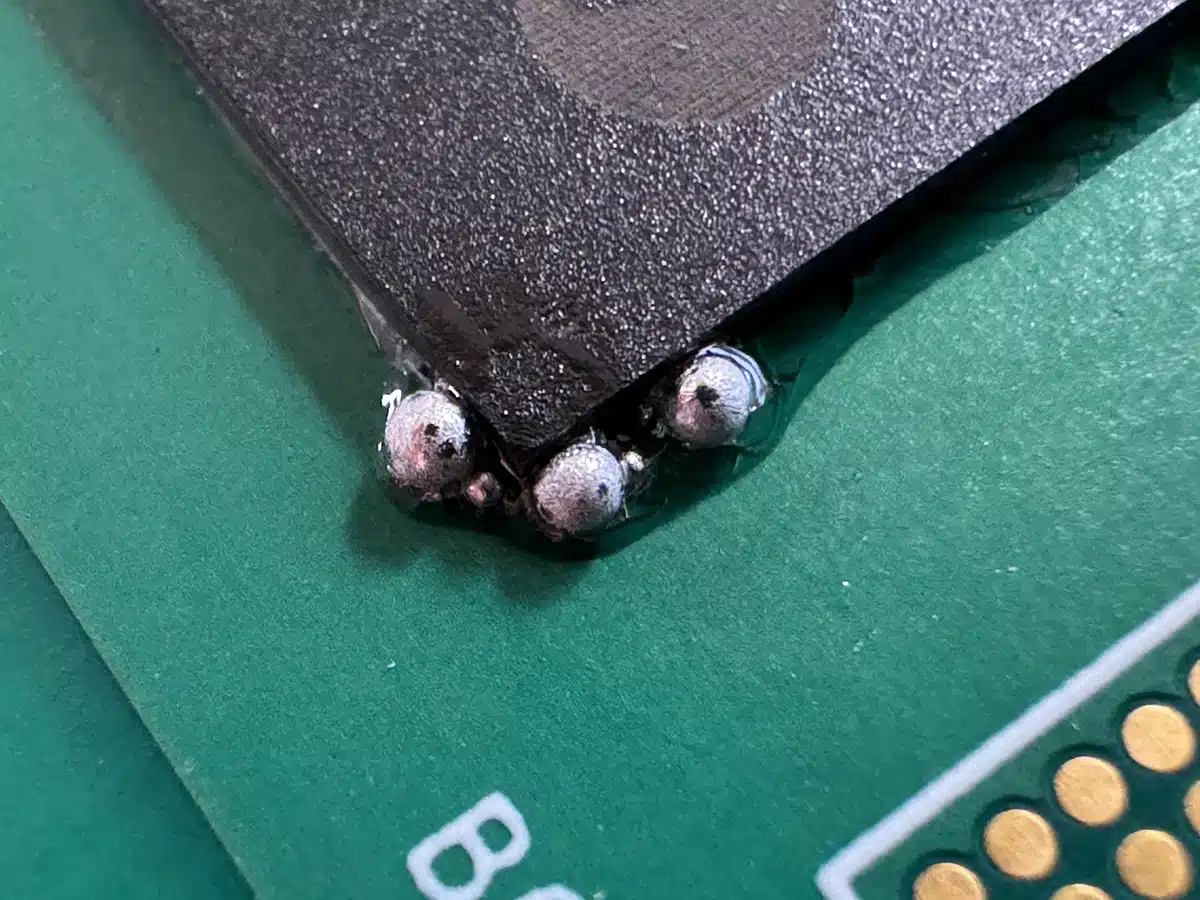
Example of solder ball attached to a metal surface (conductor/track).
Solder balls that can get loose by vibration in their environment of use, that are not encapsulated or that are loose are a defect for all product classes. They must be removed, otherwise an electrical short (short circuit/bridge) may occur.

Example of a solder bridge caused by a solder ball.
Now the next question arises: when does the ball get loose (how fixed should it be)?
For this we have to look at the service environment. A laptop is likely to have less vibration than a punch press. The best choice is to remove all visible solder balls (with an ESD safe brush, or gently with tweezers). As an alternative, you can also cover the PCB with a protective lacquer (conformal coating). This prevents the solder balls to get loose by vibration.
So the solution is to remove solder balls or cover them with conformal coating!
What causes solder balls?
- Bad solder paste. Solder paste is normally stored in a refrigerator (about 7°C), then when it comes out of the fridge the solder paste has to acclimatize, be mixed and then the solder paste can be used for stencil printing. If the paste does not acclimate long enough, there may be too much solvents left in the solder paste causing the paste to be too moist. Solder balls are usually caused by moisture (air or water, trapped in solder paste), vapor that escapes from the paste and turns into liquid. If the vapor in solder paste escapes too quickly, a small amount of liquid solder is sprayed out of the solder joint (think of a volcanic eruption) and a solder ball is formed as it cools. See video: https://youtu.be/utam625DQpo

Solder balls caused by too “fresh” (poor mixed solder paste).
- Design error, wrong distance between the pads, causing the paste to be pressed under the component and stick to its side. This can also be caused by stencil openings that are too large, resulting in too much solder paste on (next to) the pads.

- PCBs contain water, especially if they are stored in a humid environment and not dried before assembly. This can also occur if PCBs are too new and have not dried sufficiently. The plated through holes (PTHs) are never 100% airtight, so moisture can enter the solder connection through the hole wall, causing air bubbles to form that can result in solder balls (think of a volcanic eruption).

- There is too much flux in the solder paste or too much flux is applied before/during soldering.

- The preheating temperature is not high enough, so the flux has failed to evaporate effectively.
- A solder paste printing problem due to the stencil was not being cleaned properly, causing the solder paste to stick in unexpected places.
- Bad solder mask quality, the solder balls stick to the surface of the solder mask after wave soldering.
How can you prevent solder balls?
- Design the correct pad geometry and distances according to the recommendations in the datasheet.
- Reflow profile – increase the preheat temperature if necessary. (ramp up)
- Temper the circuit board before the stencil printing in an oven to allow all moisture to escape.
- PCB Quality — The PTH-wall thickness of the copper in the through-hole holes is greater than 25 µm to prevent water from remaining in the printed circuit board.
- Hot-air-knife after wave soldering, the balls are blown away by the hot air knife.